DIY Awning Installation in South Africa: What You Need to Know Before You Start
One of the most common questions we get asked at Reboss is: can I install the awning myself? The honest answer is yes — in many cases, a Reboss awning is a perfectly achievable DIY project for a confident home handyman. But there are important things to know before you pick up a drill.
This guide walks you through everything you need to consider before attempting a DIY awning installation in South Africa — from the tools you'll need and the wall types you'll encounter, to the common mistakes that turn a straightforward job into a costly problem.
Is DIY Awning Installation Right for You?
Before anything else, be honest with yourself about your DIY skill level. A Reboss awning installation is not a complex job but it does require:
• Confidence working with a power drill and masonry bits
• The ability to work safely at height if installing above ground floor windows
• Basic understanding of how to use a spirit level
• Patience to measure accurately — twice — before drilling
• Confidence identifying your wall type and selecting the correct fixings
If you are comfortable with all of the above — DIY installation is absolutely achievable and will save you the cost of a professional installation. If any of those points give you pause, professional installation is the wiser choice.
Tools You Will Need
• Power drill with hammer function
• Masonry drill bits — size depends on your anchor bolts (typically 8mm or 10mm)
• Spirit level — essential for getting the awning perfectly horizontal
• Tape measure
• Pencil for marking drill positions
• Safety glasses — always when drilling
• Ladder or scaffolding if installing above ground floor
• Spanner or socket set for tightening bolts
• Silicone sealant — to weatherproof around bracket fixings
Understanding Your Wall Type
The most important factor in a successful DIY awning installation is correctly identifying your wall type and using the right fixings. Using the wrong anchor in the wrong wall is the number one cause of awning installation failures.
Brick and Mortar Walls
The most common wall type in South African residential construction. Drill into the brick itself — not the mortar joints — using a standard masonry bit. Use expanding anchor bolts or Fischer plugs rated for the awning weight. This is the most straightforward wall type for DIY installation.
Plaster Over Brick
Same as brick and mortar but drill through the plaster layer first before reaching the brick. The plaster adds no structural holding strength — your anchor must be firmly seated in the brick behind it. Use a longer anchor bolt to ensure adequate depth into the brick.
Concrete Walls and Lintels
Common in commercial properties and modern residential construction. Requires a hammer drill and carbide-tipped masonry bits. Concrete provides excellent holding strength when anchored correctly — use chemical anchors or heavy-duty expanding bolts for maximum security.
Lightweight Block (Nutec, AAC)
Lightweight aerated blocks require specialist fixings specifically rated for lightweight substrates. Standard expanding plugs will not hold adequately in lightweight block. Use specialist toggle bolts or chemical anchors designed for lightweight masonry — consult your hardware supplier for the correct specification.
Cavity Walls
Found in some older construction. Drilling into a cavity wall without knowing where the inner leaf is can result in fixings with no holding strength. If you are unsure whether your wall is solid or cavity — call a professional.
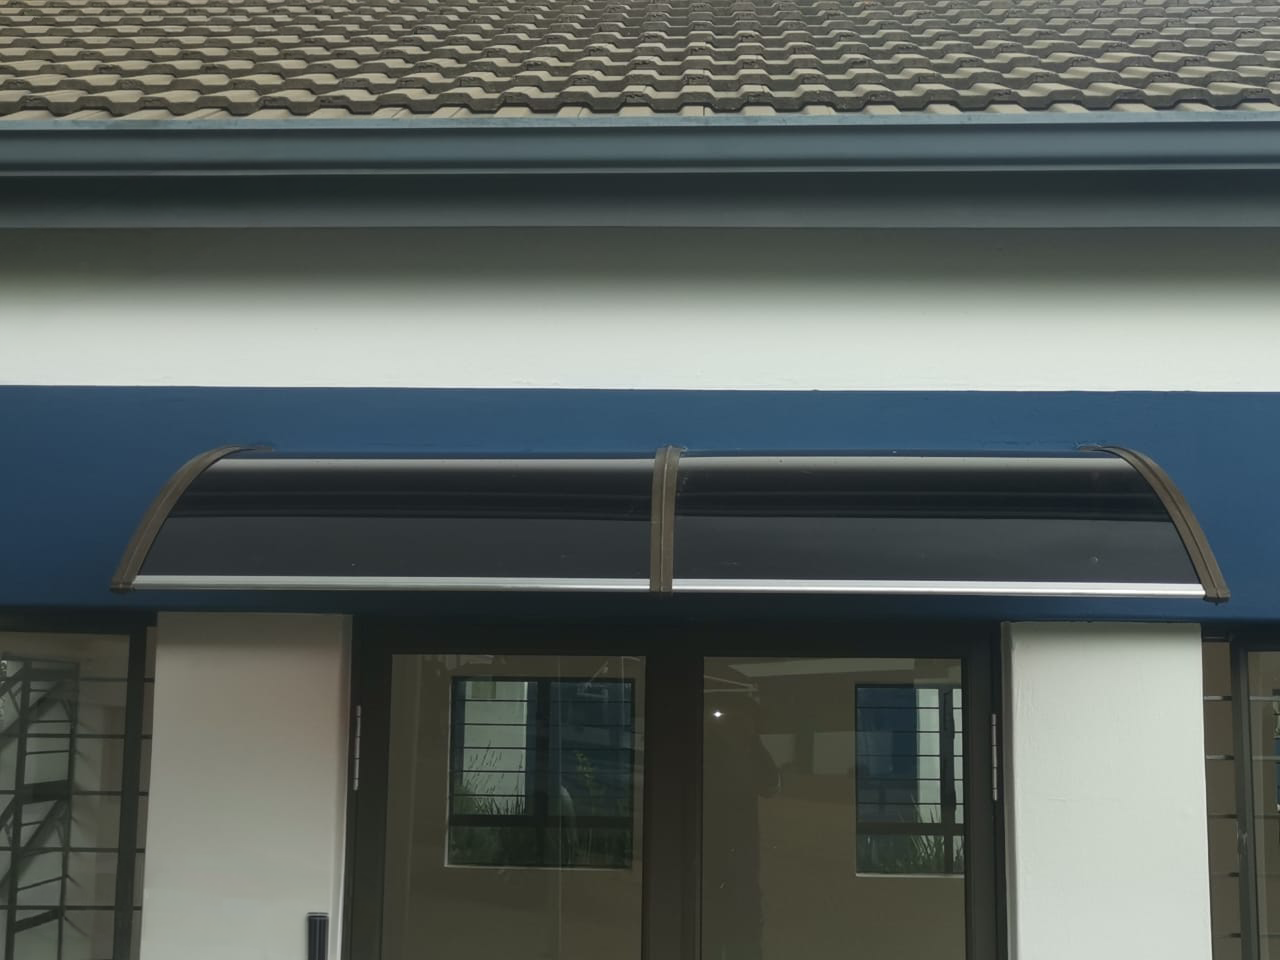
Step-by-Step R-Series Installation Overview
The Reboss R-Series comes with full installation instructions. Here is a general overview of the process:
Step 1 — Mark Your Bracket Positions
Using the installation template provided, mark the bracket positions on the wall above the window. Use a spirit level to ensure the marks are perfectly horizontal — even a small deviation will be visible once the awning is installed. Double-check all measurements before drilling.
Step 2 — Drill and Fix the Brackets
Drill to the correct depth for your anchor bolts — typically 60-80mm into solid brick or concrete. Clear dust from the holes and insert your anchors. Mount the brackets and tighten firmly. Check again with the spirit level that all brackets are aligned.
Step 3 — Apply Silicone Sealant
Before the brackets are fully tightened, apply a bead of silicone sealant around each fixing point. This weatherproofs the penetration and prevents water from tracking into the wall behind the bracket. Allow to cure before proceeding.
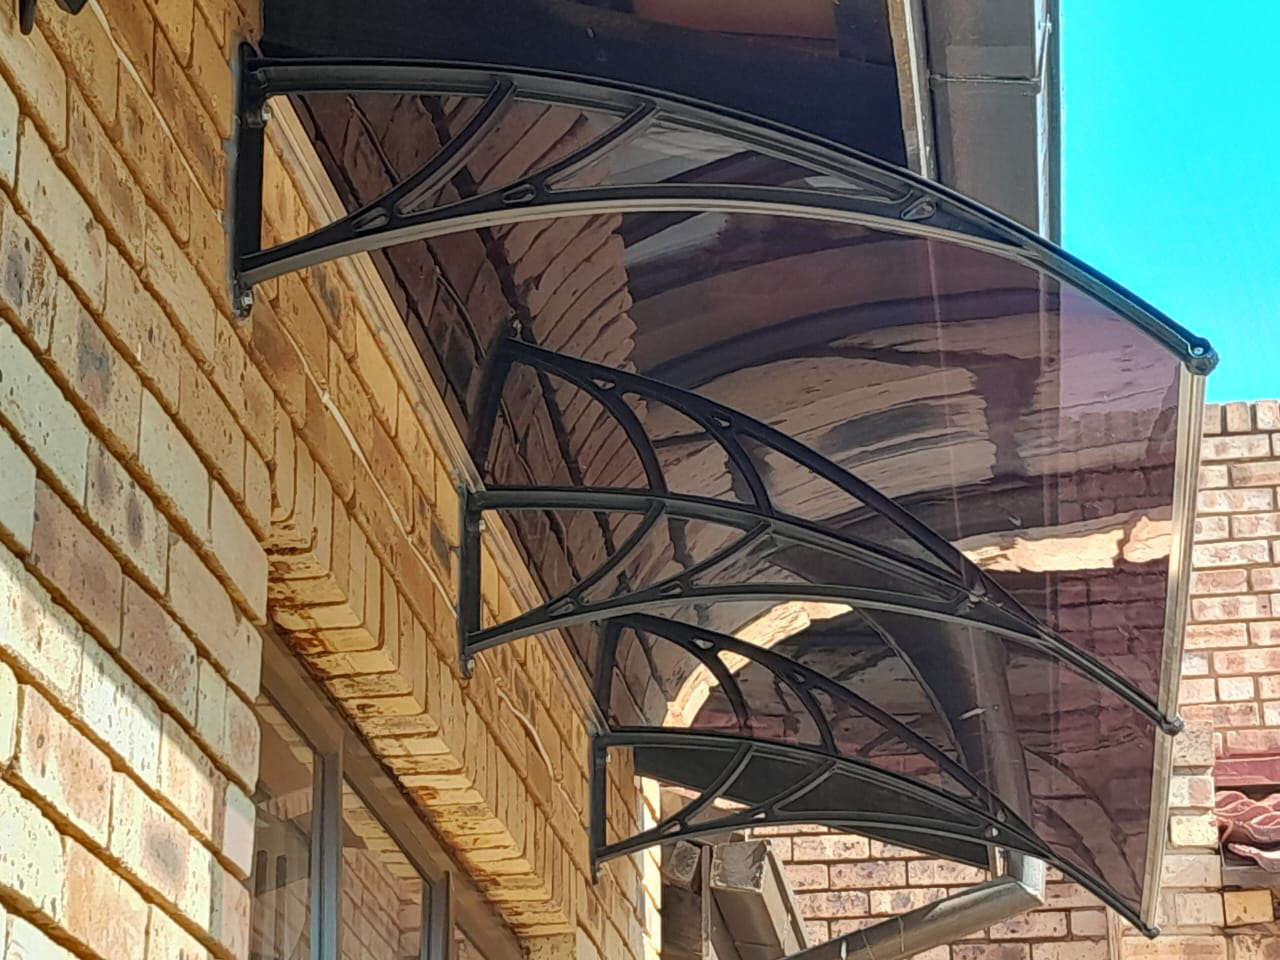
Step 4 — Mount the Awning Frame
Following the R-Series instructions, attach the aluminium frame to the mounted brackets. This is easiest with a second pair of hands to hold the frame in position while you secure the fixings.
Step 5 — Install the Sheeting
Slide the acrylic or polycarbonate sheet into the frame channels as per the instructions. Ensure the sheet is correctly seated and that any protective film is removed from both surfaces.
Step 6 — Final Check
Stand back and check the awning is level, the sheeting is correctly installed, and all fixings are tight. Test that water would run off correctly by checking the angle of projection.
Common DIY Installation Mistakes to Avoid
• Drilling into mortar joints instead of brick — mortar provides very little holding strength for anchor bolts
• Not using a spirit level — an awning that is even slightly off-level is immediately obvious and very difficult to correct once drilled
• Using the wrong anchor type for the wall — the most common cause of awning failure in high winds
• Not sealing around bracket fixings — leads to water ingress and wall damage over time
• Installing too close to the window frame — the awning needs clearance above the frame to allow for correct projection angle and water run-off
• Removing the protective film from the sheeting before installation — the film protects the surface during installation and should only be removed once the awning is fully mounted
When to Call a Professional Instead
Our honest advice is to use professional installation in these situations:
• Any installation above the ground floor — safety is paramount
• Cavity walls or any wall type you are not certain about
• Joining multiple R-Series units across a wide span — alignment is critical
• Commercial properties where structural integrity requirements are higher
• If your first hole doesn't go as planned — stop and call us rather than drilling multiple holes
Get Help From the Reboss Team
Whether you decide to install yourself or prefer our professional installation team, Reboss is here to help at every step. Our team can advise on the correct fixings for your wall type, confirm the right awning size for your window, and provide a professional installation quote at no obligation.
→ Contact Reboss for Installation Advice or a Free Quote
RELATED POSTS